Writing a Browser-based WebAssembly Application in Rust
Porous Absorber Calculator
Preamble
The purpose of this blog is not to explain any of the principles of acoustics or how to interpret the data plotted on the graphs shown below, but rather to describe the architecture of a browser-based WebAssembly application written in Rust.
If you wish to see an explanation of the basic acoustic principles behind the Porous Absorber Calculator spreadsheet, please watch this video. The slides used in that presentation are available here
All the Rust coding examples shown below are taken from the Git repo for the Porous Absorber Calculator
Introduction
My interest in room acoustics started in 2003 when I became involved in the design and build of a recording studio control room. As part of studying this subject, I implemented what I had learnt in two Excel spreadsheets: the first was a general purpose tool for determining the reverberation time of a rectilinear control room, and the second was a tool for plotting the absorption curve of a porous absorber
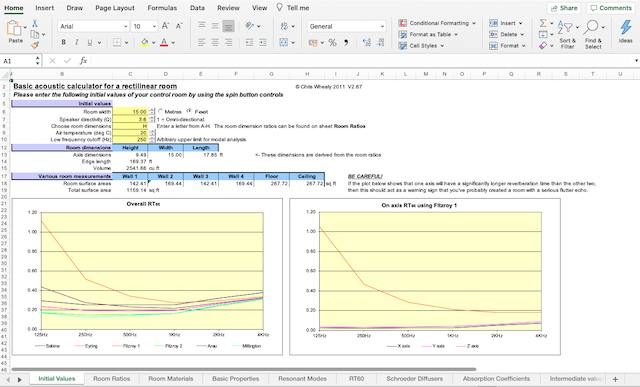
In Excel, the Control Room Calculator look like this:
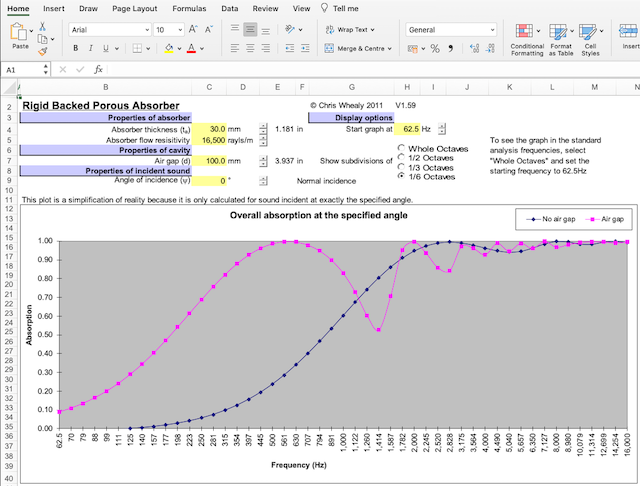
And the Porous Absorber Calculator look like this:
 ]
]
Unfortunately due to their age, these spreadsheets will only function correctly in the Windows version of Excel (sorry, Mac users…)
Fast Forward to 2019
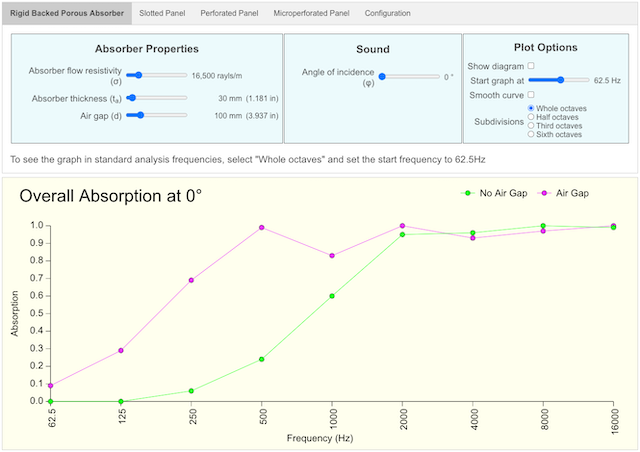
Having just been made redundant from my previous job and having lots of time on my hands, I decided to learn Rust — primarily because it compiles to WebAssembly. After completing the simpler coding exercises, I needed a more real-life application to work on and decided to reimplement my Porous Absorber spreadsheet as a Web-based, WebAssembly app.
Seeing as this was my first real-life app, it took me a while to work out how to get all the pieces to fit together, but after a couple of months of battling my own inexperience, I was able to get this Web-based app up and running.
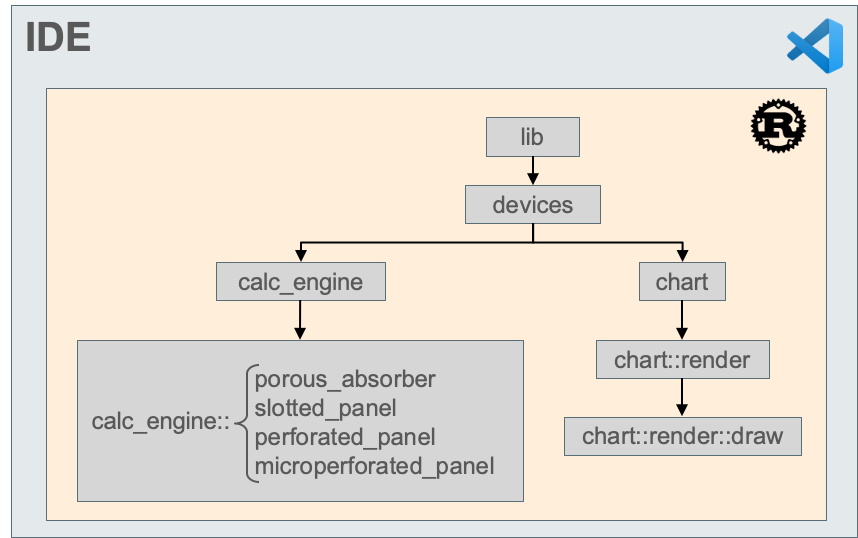
General Architecture
The app was developed in Microsoft’s Visual Studio and uses the following hierarchy of Rust modules (for the sake of simplicity, some modules have been omitted):
The objective here was to create an app that runs in the browser; however, since a browser cannot directly execute a native Rust application, it must first be compiled into a format that a browser can execute — and this is where WebAssembly comes in.
Compiling Rust to WebAssembly
To compile a Rust application into a WebAssembly module, you need to use a tool such as wasm-pack.
This tool acts as a wrapper around cargo build and generates a WebAssembly module (a .wasm file) from the compiled Rust code.
However, WebAssembly modules can be executed in a wide variety host environments.
In our case, we wish to execute this WebAssembly module in a browser, so our specific host environment will be the JavaScript runtime environment within a browser.
This therefore means that the --target parameter of wasm-pack must be set to web.
$ wasm-pack build --release --target web
[INFO]: 🎯  Checking for the Wasm target...
[INFO]: 🌀  Compiling to Wasm...
   Compiling porous_absorber_calculator v1.1.0 (/Users/chris/Developer/porous_absorber)
    Finished release [optimized] target(s) in 2.63s
[INFO]: ⬇️  Installing wasm-bindgen...
[INFO]: Optimizing wasm binaries with `wasm-opt`...
[INFO]: ✨   Done in 3.38s
[INFO]: 📦   Your wasm pkg is ready to publish at /Users/chris/Developer/porous_absorber/pkg.
Executing a WebAssembly Module in the Browser
The addition of the --target web parameter tells wasm-pack that we wish to run the generated WebAssembly module in the browser, and wasm-pack then helpfully generates a JavaScript polyfill for us.
The polyfill acts as a wrapper around the WebAssembly module and enables us to use the JavaScript import statement as we would for any other JavaScript module.
This makes consumption of WebAssembly-based functionality super-easy.
import init,
  { porous_absorber,
    slotted_panel,
    perforated_panel,
    microperforated_panel,
  } from '../pkg/porous_absorber_calculator.js'
How to Start the Rust Development Process
Declare a Rust Library Project
Given that this type of application is going to run within the context of some larger host environment, you start by creating a Rust library project:
$ cargo new --lib some_project
     Created library `some_project` package
Declare a Dependency on wasm-bindgen
When writing a Rust application for WebAssembly, the first thing to do is declare a dependency on the wasm-bindgen crate.
As with all Rust dependencies, this declaration is made in your project’s Cargo.toml file:
[dependencies.wasm-bindgen]
version = "^0.2"
features = ["serde-serialize"]
In addition to stating our dependency on the wasm-bindgen crate, the above statement additionally declares the use of the optional crate feature serde-serialize (JSON (de)serialization functionality will be needed when transferring information to and from JavaScript).
Now that this basic dependency has been stated, we can start to write some Rust coding that is intended for invocation from the WebAssembly host environment.
Define the Entry Points Visible to the WebAssembly Host Environment
In the top-level ./src/lib.rs file, we need to declare at least one function to act as the entry point for code running in the host environment.
In the case of this Porous Absorber Calculator app, there are four entry points - one for each type of absorption device:
- Porous Absorber
- Slotted Panel Absorber
- Perforated Panel Absorber
- Microperforated Panel Absorber
So in ./src/lib.rs we define normal public Rust functions, but precede them with the #[wasm-bindgen] macro:
#[wasm_bindgen]
pub fn porous_absorber(wasm_arg_obj: JsValue) -> JsValue {
  do_porous_absorber_device(wasm_arg_obj)
}
This macro identifies the subsequent function as an entry point for coding running in the WebAssembly host environment. In other words, we’re using this macro to construct the WebAssembly module’s public API.
There are a couple of things to notice here:
- Whatever name is used by the public Rust function appears as the name seen in the JavaScript
importstatement shown above. - The
porous_absorberfunction takes a single argument of typeJsValueand returns a result that is also of typeJsValue.
So, What Values are of Type JsValue?
At the moment, the datatype JsValue is something of an untyped-type and does not exist as a specific datatype in Rust.
The actual transfer of data between Rust and the JavaScript host environment happens in the generated JavaScript coding.
Suffice it to say, when you call the exposed porous_absorber function from JavaScript, all you need to do is pass in a regular JavaScript object.
Then, when the data arrives on the Rust side of the interface, you will receive a serialized JSON object as a text string.
Handling Incoming JavaScript Data in Rust
Upon arrival in the Rust function, the serialized JSON object must first be deserialized; however, this process usually happens in two steps:
- Deserialize the entire JSON string into a Rust
structwhose fields are all of typeString. - Then if necessary, parse the individual
Stringvalues into the relevant Rust datatype.
In the case of the porous_absorber function, this receives the wasm_arg_obj parameter from JavaScript and passes it straight through to function do_porous_absorber_device which then does the following:
-
First the JSON string is deserialized into a predefined
structwhose fields are all of typeString:#[derive(Deserialize)] struct PorousAbsorberArgs { absorber_thickness_mm: String, flow_resistivity: String, air_gap_mm: String, angle: String, graph_start_freq: String, smooth_curve: String, subdivision: String, show_diagram: String, air_temp: String, air_pressure: String, } pub fn do_porous_absorber_device(wasm_arg_obj: JsValue) -> JsValue { // Parse object received from JavaScript let arg_obj: PorousAbsorberArgs = wasm_arg_obj.into_serde().unwrap(); // SNIP }We now have an
arg_objstruct in which each of the individual fields are of typeString -
Next, where necessary, the
Stringvalues need to be parsed to the correct Rust data type.So for instance, when the
absorber_thickness_mmargument is used in calculations, it is needed as au16value, so we next have the statement:let absorber_thickness_mm = arg_obj.absorber_thickness_mm.parse::<u16>().unwrap();
Preparing Rust Data to be Sent to JavaScript
When we wish to send data back to JavaScript, the return value of type JsValue is created simply by serializing the outgoing Rust struct:
JsValue::from_serde(&chart_info).unwrap()
Calling JavaScript Functionality from Rust
In order for the Rust coding to invoke functionality in the host environment, we need to use the #[wasm-bindgen] macro in conjunction with Rust’s Foreign Function Interface (FFI).
A typical task for a Web-based application is to be able to write trace/debug output to the Browser’s console. This can be done as follows:
In any module that requires this functionality, declare the use of an FFI in conjunction with the #[wasm-bindgen] macro:
#[wasm_bindgen]
extern "C" {
  #[wasm_bindgen(js_namespace = console)]
  fn log(s: String);
}
This declaration states that in some external library, there will be a function called log living in a namespace called console that accepts a single argument of type String.
The wasm-bindgen functionality then links this declaration with the browser’s console.log API and we can now write directly to the browser’s console:
log(format!("Absorber thickness = {}mm", absorber_thickness_mm));
Manipulating the Browser DOM from Rust
Now that we have built a two-way bridge between Rust and JavaScript (via WebAssembly), we can look at writing code that directly manipulates the elements in the Browser’s DOM.
In the case of this Porous Absorber Calculator app, we need to plot a chart using an HTML5 canvas element.
To do this, first need to declare the use of another crate: web-sys.
The web-sys crate provides access to all aspects of the Browser’s API; however, as you might well realise, a Browser’s API contains a huge number of functions - most of which are not relevant for our immediate task.
Therefore, in order to avoid declaring dependencies on functions that will never be needed, each API function is exposed as an optional Rust crate feature.
Now, rather than making a single declaration that pulls in all the functions in the API, each required function must be declared on an as-needed basis.
So, your Cargo.toml entry for web-sys must explicitly list each required function as a feature and would look something like this:
[dependencies.web-sys]
version = "^0.3.4"
features = [
  'CanvasRenderingContext2d',
  'Document',
  'Element',
  'HtmlCanvasElement',
  'HtmlImageElement',
  'TextMetrics',
  'Window'
]
Accessing Specific DOM Elements
Using these web-sys features, we are now able to access not only the HTML canvas element, but the 2D rendering context object within the canvas element.
The following code is taken from function device_diagram in the module chart::render::draw:
pub fn device_diagram(
  device: &GenericDeviceInfo,
  widest_y_tick_label: f64,
  y_axis_length: &f64,
  y_axis_inset: &f64
) {
  // SNIP

  let document = web_sys::window().unwrap().document().unwrap();
  let canvas_el = document.get_element_by_id(render::constants::GRAPH_CANVAS_ID).unwrap();
  let canvas = canvas_el.dyn_into::<web_sys::HtmlCanvasElement>().unwrap();
  let ctx = get_2d_context(&canvas);

  // SNIP
}
Right at the start, we can see that the call to web_sys::window() would not be possible if we had not first explicitly declared the use of the web-sys feature Window in Cargo.toml.
Aside
The coding that unloads the 2D rendering context from thecanvasobject is rather ugly, so it has been hidden away inside functionget_2d_contextpub fn get_2d_context(canvas: &web_sys::HtmlCanvasElement) -> web_sys::CanvasRenderingContext2d { canvas .get_context("2d") .unwrap() .unwrap() .dyn_into::<web_sys::CanvasRenderingContext2d>() .unwrap() }
It is also worth commenting on the use of function dyn_into::<T>().
Since JavaScript is an untyped language, when we call get_element_by_id, we just have to trust that the object we get back really is of the type we expect.
So when the canvas_el object is created in the coding above, the Rust compiler is unable to make any guarantees that the returned object really is an HTML canvas element.
Consequently, we need to perform a dynamic cast of the object that might be a canvas element into an object that really is a canvas element.
This is why from time to time, we have to call function dyn_into::<T>().
Manipulating the HTML Canvas
If you have any familiarity with writing JavaScript code to manipulate an HTML canvas element, then you will see some distinct similarities in the Rust code.
Now that we know how to access the 2D rendering context of the canvas element, we can create a function that takes this context as an argument, and then draws a circular plot point:
fn draw_point(
  ctx: &web_sys::CanvasRenderingContext2d,
  point: &PlotPoint,
  fill_style: &JsValue
) {
  ctx.begin_path();
  ctx.save();

  // Draw filled circle
  ctx.set_fill_style(fill_style);
  ctx
    .arc(point.x, point.y, render::constants::PLOT_POINT_RADIUS, 0.0, TAU)
    .unwrap();
  ctx.fill();

  // Draw black edge
  ctx.set_line_width(0.5);
  ctx.set_stroke_style(&JsValue::from(chart::constants::RGB_BLACK));
  ctx.stroke();

  ctx.restore();
}
Another Aside
If you’re wondering why the constantTAUpops up every now and again instead of the expected value2.0 * std::f64::consts::PI, then please read the Tau Manifesto.
Conclusion
In reality, writing a browser-based app in Rust is not much harder than writing a browser-based app in JavaScript. There are of course fundamental differences in the language constructs being employed, but the additional steps of compiling a Rust app to WebAssembly, then consuming that WebAssembly module via its JavaScript polyfill are both very straight-forward.
There are however, certain areas of Rust functionality that do not yet “play nicely” with the interface between WebAssembly and JavaScript — most noticeable is the fact that the JsValue data type mentioned above cannot be used in multi-threaded coding.
In spite of this restriction, very useful and powerful applications can be written in Rust which, when compiled to WebAssembly, will run very smoothly in the browser.